Log into the Google Admin Console admin.google.com
Navigate to Devices -> Chrome -> Printers
Select the organizational unit containing the users you would like to have access to the printer/copier
In the bottom right-hand corner of the window hover your cursor over the plus symbol and select the button with the printer icon on it
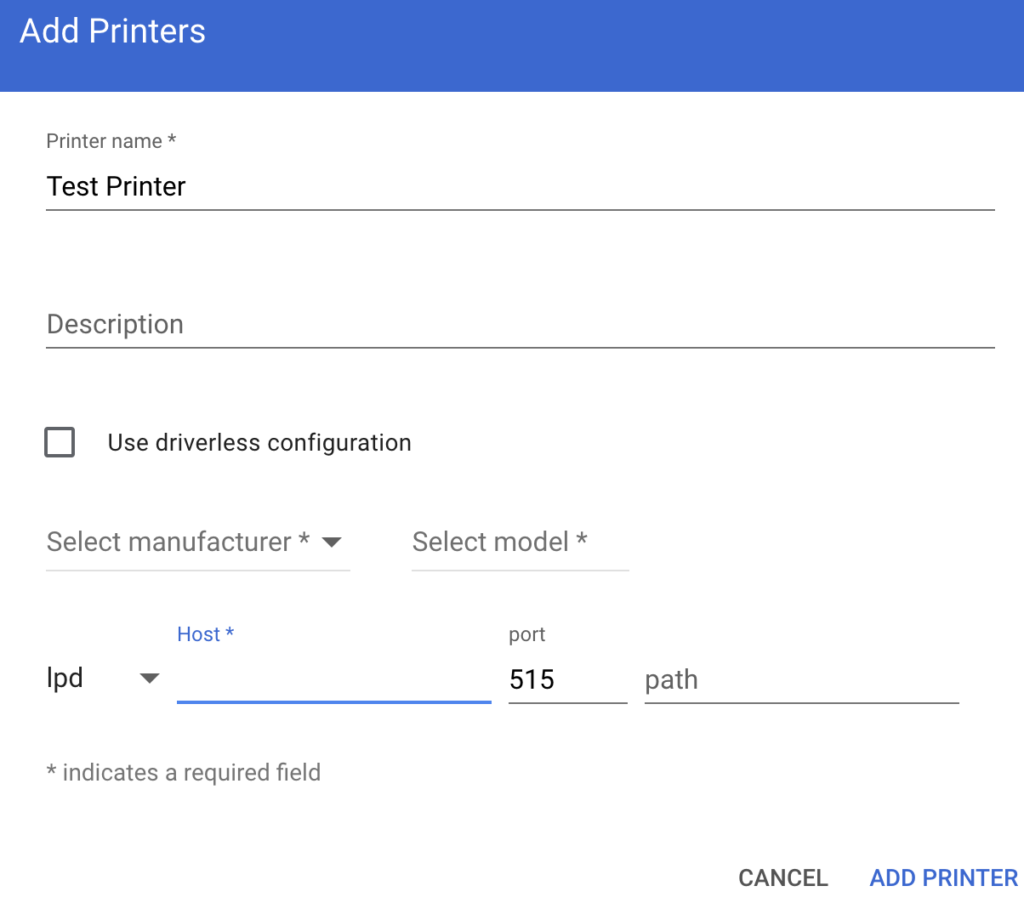
- Enter the Printer Name. Chrome users will see this name
- Enter a Description (optional)
- select lpd
- Host = enter IP address of the printer
- Port and Path = Accept defaults
- Select “ADD PRINTER”
Allow use (remember this step)
- If need be re-select the organization unit you selected above
- Click on the printer/copier you just created
- From the slide-out menu adjust the slider to the right next to “Allow for users in this organization”
The printer should then show up in a few minutes (might take a logout and login of the device)